Book Trailer, Production

Production: Photoshop plus CelAction

There was a lot of stuff to do in Photoshop. Like a lot a lot. As i solved problems in Photoshop new ones arose. I’m getting ahead of myself sorry, yes, so I did the Photoshop stuff for this project. Jess handled the After Effects and editing bless her, I think she may have almost killed herself with helping me, she has been a life saver. But Photoshop was my job due to my skills with the software, I have made a majority of my mums most recent book covers a plethora of boxset covers and the entirety of the Army Doctor’s Baby series covers are knocked up by me. So I have had previous experience with said software.

One of the main jobs I was doing was cleanup, I had to take out the wires and the tape and whatever else might be in frame but shouldn’t be. It was a slow job, easy, but slow. But as I went I realised that some of the connections between the light changes and the cover falling and the intro’s and outro’s didn’t quite work. So I took to trying to make the between pictures more alike, pulling out the book cover and replacing it slowly with the other one, making it transition smoother by replacing the table underneath and putting in one I had to synthesize from some pictures we took on set of the table, yeah it became I slightly more difficult job as I went on. But after about two days of constant clickity click and dull grey Photoshop windows I was done. It was actually quite enjoyable, I do quite like working in Photoshop, and towards the end when i was having to connect up two different bits it stretched my skills, almost a Photoshop work out in a way.

Then comes CelAction, the plucky new 2D software our college was recently blessed with. Jess had done a leg swing animation for the final production of Portal Arcane in it (once again going above and beyond the call of duty) and then it came time for my turn. I have used the software before but haven’t gone on it in a while and was a bit unsure. I soon got the hang of it and was animating like a pro… well not animating like a pro, animating like someone who isn’t very good at animating but knows how to use the software they are on to a degree, there ya go that’s more apt.

It was my CelAction job to do the falling man from shot four. I wanted him to fall and had previously in tests animated in after effects but due to having CelAction at our disposal and it’s particular affinity with cut out animation I thought it was rather applicable. In the test I had done before the paper connectors which make it so the parts of the character are attached to the paper border fell with the character. However I thought it would be an interesting effect if the paper connectors broke like they where taught ropes and then the character fell disconnected from said ropes. This idea also worked as the main character in the book (the one we are depicting) hangs himself in jail which is what brings him to the sort of underworld style reversion world. So the paper connectors breaking symbolizes his grip on life breaking and also represent the rope he used to hang himself being used to break said grip.

After about two days I had made a Photoshop file that could be animated in CelAction and had animated the rope breaking and the character falling. I was actually really chuffed with the rope breaking animation and the falling looked rather good. Unfortunately… yeah i used the wrong file, the photo which i based the animation on was one of the TIF files we had of that shot, but it turns out the ones which where being used where the BMP’s, which wouldn’t be a problem apart from the fact that the TIF i used was less focused than the BMP which was being used and so looked entirely wrong… needless to say I was disappointed but still I will re do it with the right photo but it will probably not be in time for the hand in and will be used in the version I will actually give to J Thorn instead.
Standard
Book Trailer, Production

Production: Location Filming

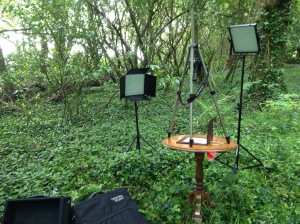
We filmed in two on location places, one was a back room of my grandparents house which looked sufficently old and creepy, the second was the woodlands not too far from my home. For the on location filming we had to film the intro, outro and the book opening and closing. We filmed in the forest (which was the outro) first. Me and Jess drove out into a deeper part of the woodland lugging the old table i had bought before along with the book outer bits… not sure if there is a word for it, the spine the cover and back but with no paper in it. We also brought a compliment of duct tape and wire for guerrilla filmmaking/animating.

IMG_0527 IMG_0528 IMG_0529

We fashioned a wire duct tape combination to hold up the book ready for falling, and then built ourselves our own little rostrum out of my tripod. The lights didn’t quite conform to the measurements we took in the stop motion room unfortunately, due to a little bit of uneven ground and the fact that the sun was acting as our backup light. We at first tried filming the cover falling down by just dropping it down and making the camera continuously take pictures (as we were going to film in pixelation) but the book fell far too fast to be captured correctly. We then fashioned another wire contraption (the savvy Macgyuvers that we are) which Jess could use to slowly lower the book cover while i made sure the spine moved correctly with my finger and held down the picture button on the camera. All the wires and fingers and such I would edit out in Photoshop. Finally we did the outro, which was the camera moving up and away to reveal the book and table where now in the reversion world aka a woodlandy area. We achieved this with me lifting the tripod and camera and walking backwards with it, Jess held down the picture button making it continuously take photos and also in the ending bit did focus pulling.

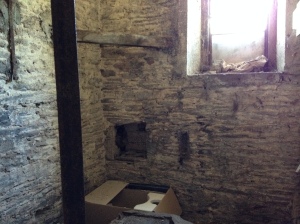
The second location was a different kettle of fish however, the sun while it was our backup light it was a backup light filtered through this.

IMG_0538

So a little less helpful to the cause. And the room we used was… well it wasn’t the biggest room ever.

IMG_0505

So we had to move around some stray boxed full of random things my grandparents had stowed there such as big boxes of roof tiles. After we cleared the space a little there was just enough room for us to squeeze in with the table and two lights. So full steam ahead, tally ho and all that right? wrong, unfortunately. Well not wrong per say, the lowering down the back of the book onto the table was similar to the lowering of the cover in the first location (apart from having a big block of paper balanced on end in the spine of the book). Wire book lowerer, wire and duct tape holding up maggufin, all that jazz.

IMG_0537

But then came the intro. As you know, if you read the beginning of this post, I’m not sure why you wouldn’t have considering your here… unless you skipped to this point of course, which if you did welcome i suppose. As i was saying, as you read earlier (or haven’t as the case may be) we achieved the outro by lifting off the tripod rostrum and walking backwards with it taking pictures as we went with the auto take many pictures function (wow don’t i just sound like a technical wizz). The problem we now had is that the intro is meant to walk up to the table and settle down which is a bit difficult when your camera is kind of in a specific location position wise. We ended up achieving this look by doing the walk back again and simply reversing the video in post, but that was not the troublesome part.

The real problem was keeping the book complete with large stack of paper standing directly upright as we filmed the intro. This may not sound incredibly hard but I actually had to make that book myself out of greyboard faux leather and PVA glue… so it wasn’t what you would call expertly crafted. The sides of the book where a tiny bit bowed and there was no way they would just stay directly upwards and shut in the best of times, let alone with a big wad of paper weighing them down. The answer was obvious as soon as the problem revealed itself though, we had to build something to hold it up simple… but the kicker was, it had to be as invisible as possible. We couldn’t have it on the side facing the camera or else it would be visible for the whole walk up the stairs, and we didn’t want it splaying out across the table either. So using wire (that wasn’t really that rigid) and tape, we had to make a construction that was only on the back part of the spine but would effectively hold two A4 bits of greyboard with faux leather wrapped around and at least over fifty pieces of paper directly upwards and together. Simple goal but not a simple task.

After what I would imagine was an hour or more (or maybe it only felt like that) we had something that worked. A large amount of wire had been shoved up between the pages and inside the book running up and down, but we had done it. We filmed our intro doing the walk back from the book tripod in hand and camera snapping, but it was too dark. We had to move the lights away obviously so they didn’t get in the walking away shot, but the sun just wasn’t shining and from inside that room with its single window it was just pitch black.

We panicked a bit, but then thought hay we could just do the walk back again couldn’t we. I mean it wouldn’t be in the exact same place on the starting book point which is why we walked backward in the first place, but better to have it look good and a little off than literally un-seeable but perfectly in line. So we did another two takes to try and get a good one and then our construct, our mona lisa of all wire maguffins failed us, the book toppled and so did our chances of getting another run at the intro. So we packed everything up and left, a days work done. Also we ended up using the second take, had the best lighting.

Standard
Book Trailer, Production

Production: Animating

The final animating of paper falling was done by myself and a first year called Jess. She worked the computer and worked kind of like the animation director a tad giving me directions as to whether i was lowering the falling paper on the fishing hooks too much or two little frame by frame. In the end while all the tests I had done with Billy with the paper falling had helped with the technical side of how the rig worked and such Jess helped with the final look of the paper falling as the way I had previously been doing it with billy had been slow at the beginning and then speeding right up into the page hitting the floor. Jess helped make the fall look more realistic by suggesting a slow-fast-slow tactic which worked like a charm.

IMG_0539

The two Lime Light LED panels we had where at a height and direction from the pages which we measured to make sure if we ever had to pack them away leave the stop motion room and reassemble them we could have identical lighting. It was also the first time we were using the green screen version of our rig so we had to do a few lighting tests which involved maximum keying out ability. Due to the build of the rig we could not light the green screen behind it separately so both the all important paper and the green screen where lit simultaneously. Luckily the keying worked fine and there was no further trouble with that element.

IMG_0524 IMG_0526 IMG_0525

Uhhhh… Yeah those are my shoes under the desk… I can’t help it if to animate my feet have to be free. Aside from a few instances of having to vacate the room to return the LED panels to the ERC and then book them back out almost immediately we didn’t have any significant gaps in the animating. However due to the first shot being designed very early in the production it’s side holes where of a much smaller size than the rest of the shots we had to rejigger the way the rig held up the paper for it and deal with the shot last.

Due to time constraints the gap between filming the rest of the shots and the first one was about two days and we actually did on location filming in that time. One of the most irksome things however was the fact that whenever the battery ran out we had to de-attach the camera from the rostrum and take it out to be charged as neither Jess (who’s camera it was) or the college had one of those cables which plugged directly from the camera into an energy socket. This wouldn’t have been so annoying apart from the fact every time we had to take the camera off the rostum we completely lost the shot and would usually have to start over if we were in the middle of a shot. Luckily that never happened when we were too far into any shots so that’s good.

Standard
Book Trailer, Production

Production: Paper Linker

Netting Staples, the word that has been on my lips for the past day, or what i was more likely to say “these things”

IMG_0519

I found them in the range and have been hoping they where my salvation for a while. Unfortunately they have not been as of yet, partially due to the fact that i think these ones are too small, also I’m not sure if they are really what I need. You see these little netting staples I was hoping would basically act as my book spine holding all the pages together and letting them fall on top of each other in order. but as you can see from this picture.

IMG_0521

That is two paper scenes that it is threaded through and as you can see while it would happily hold them on one side and slide them over to the other side it could not hold them directly up like I want them to do when the camera tracks into the book on the table, for that I would need a more circular thing as opposed to the extreme bow shape of the netting staple.

IMG_0523

And adding to that is the fact that as i said only two of the scenes of the paper would fit on the staple so we would need a bigger staple if we where to use them. The largest staple i could find was 25mm but it was thicker rather than just longer than the one i have which is 20mm which unfortunately due to the fact that the older scenes having a slight difference in hole size thanks to a difference in the illustrator files, meaning any thicker than the 20mm netting staple would be too thick.

IMG_0522

above = newer

So that may not work, I could potentially do something a bit drastic and scary and in actuality bind the pages together with PVA like when you make a soft cover book. Though obviously that is permanent and if it goes wrong every bit of paper we have laser cut will be all but useless, which as i said is a scary prospect.

What we may have to do is use the rig we already have with the standup nail and have the greenscreen underneath and then just composite what we film from there onto what we film on location. Making it so the book isn’t involved with the actual animation at all.

The question then is how do we film the ends of the paper slowly going away from being standing straight. I mean the spine paper won’t just all be standing straight up for the whole time until the book closes, obviously the pages fall so there going to need to disappear. Maybe we could film from above the book like we planned to do for the framing and then take a shot with each piece of paper down, that could work.

Standard
Book Trailer, Production

Production: More Book Stuff

Well… well well well well. Buggar, I think i may have shot myself in the foot with the whole not doing a normal animation thing. I do believe the concept was bloody fantastic, it’s just I’m really not a hands on guy. I’m not really a fan of doing stop motion, I don’t even like using paint (it’s too messy) but i still decided to do something physical of which i have no idea how to do.

Okay well the whole animating the book/ paper falling thing is more complicated than i thought, though to be honest i have never really had a good idea of how the paper falling animation would work. I suppose I don’t really have any idea about how any of this stuff works though, I have been going into everything completely devoid of experience with only some theory which i am hesitant about to confirm what I wanted to do.

So I have to make a new way for the paper to be anchored for its fall (the nails we were using before are no longer sufficient due to the fact that they don’t work in the book spine thing.) So i discussed with Christ (the tutor) about alternatives to the nails. Billy also butted in and had to have his say (as always) and he suggested using ring binders, not a bad idea really, when he left i discussed it more with Chris saying about how maybe we could bury the middle part of the ring binder mechanism under some paper spine material as to hide its ring binder nature. But Chris suggested using these hoop nails which seem to be called netting staples. It seems they come in a large variety of sizes so they could be big enough to suit my purposes and they are rigid like the nails were, and when all bound together it will make all the pages even and together as a single book which would be nice, to have them all in order ready for fish line animating.

Also on a side note I just finished off a laser cutting session (hopefully the last) and voila!

IMG_0517

Standard
Book Trailer, Production

Production: Book Binding

The book prop. It’s kind of important, as it is practically the central frame and outro to the paper falling. So I want it doen right, just like Relentless we’re going no half measures… well apart from the fact we sort of are I guess. We are using faux leather as opposed to real leather which is kind of a half measure but… yeah no half measures apart from that.

So Chris my tutor offered to help with the book binding as he had done it before which was nice. I had looked up on the internet, videos and all that malarkey to try and gain as much knowledge as i could but it doesn’t quite compare to having a helping hand who knows what they’re doing. So we proceeded to use the faux leather, greyboard and PVA glue i had procured to make a test book (as I did not have the final laser cutting yet due to some complications) and also to make sure the faux leather was able to be stuck down by the PVA as that was a worry.

Chris showed me how it was all done, along the way i bought a stanley knife with which to do the cutting and things went along rather smoothly. There was a bit of trouble with the glue at the end as it felt like it wasn’t sticking down easily but now it seems to have stayed stuck down and i feel like it should be fine especially with the fact that for the full one i am going to have more of a leather hang over the edge so it doesn’t put as much pressure on the glue.

IMG_0514 IMG_0515 IMG_0516

Standard
Book Trailer, Production

Production: The Table

While this may not seem like the most vital element to the production in the world I am writing to talk about finding the table. If you are wondering what table I am referring to it is one which will be placed beneath the big Portal Arcane book which pages will fall down to show the story of the piece, so this table is part backdrop, part prop. I wanted it to be made of wood, hopefully with an interesting but not too busy grain on the surface, i wasn’t sure whether I wanted a dark or light wood but i thought i would sort of just go with whatever shade i find on the tables I looked at and liked. First off I looked on ebay, found a rather interesting metal table which had a rather cool leg thing, what do you call that, leg stand thingy. It was all woven and looked very old and fancy, granted it was metal but i thought that could surfice, but then i looked and it was pick up only and was about a five hour drive away so i decided against it.

After a bit more perusing, my mum i think suggested i look around charity shops for a good table. So I had a look at the charity shops around the outskirts of Plymouth, went through about three until i found a table that could just work. It had a round top (Which i hadn’t expected as I was more looking for a square table) and a minorly old looking holdy uppy thing, I would say legs but it was just one central leg, I’ll just go with leg i guess. I wasn’t 100% about it as I thought there was still a chance I would find something I liked far more in another charity shop. So I made sure to remember where the table was and continued on, I looked around a few more charity shops that day and then the next day when I was in college looked through all the charity shops in town that I could find, to see if there was anything i preferred to the round table. Eventually when I had walked all around town and looked in as many charity shops as I could find (A majority of which didn’t have any furniture in at all) I realised I was not going to find anything better than that round table. I proceeded to drive out to the charity shop from before and snap up the table before anyone else did. It cost 20 pound and fit acceptably into my car provided i put the back chairs down first.

IMG_0511 IMG_0512

Standard
Production

Production: CelAction Animation

We have to make a 30 second CelAction animation for the course. Which for those who do not know is a cutout style animation software used on things like Peppa Pig. The first thing I have to think is what do I want to animate, I mean I could just go in and start animating with a character I have built and see where it goes but I kind of want to have a bit of a plan.

So one of the first things I have to think is how ambitious I want to be here, I mean I could try and make something giant and epic but that obviously wouldn’t go too well… Hmm maybe just maybe I could make that Young Devon voting thing I wrote up some stuff for before, I do already have character design for it and a script. That would certainly cut out a step or two, allow me to get to rigging and animating as quickly as possible. I suppose I could also work with the characters i created for my old FMP idea with Jason and the Pineapple Heads, though that I did not have much of a script for so it would more be just using their character designs and then doing some animation with them that doesn’t necessarily relate to the original story they where involved with, still not the worst idea ever.

I’m not a particularly fantastic animator myself, never really been my strong point though even when I joined animation my plan was never to become a technical animator but to learn how the animation system works so i could write and potentially direct in said medium. Though they said I had to 30 seconds of CelAction animation not that it had to be amazing, don’t get me wrong I am going to do my best but I wouldn’t say to expect Disney quality stuff here.

Well i said I didn’t want to make anything too epic but… When looking for that CelAction logo earlier in the post i found this.

Look at that thing! It’s a cool sea monster, that really gets my idea juices flowing. Could do some sort of Chinese dragon style thing, with a little boat and a small little human character maybe, or maybe it could be an anthropomorphized animal or something, maybe with a little Chinese cone hat thing like Samurai Jack wears… hmm it seems like I am going on a bit of an idea train. The question is do I stop at the next “You have a time constraint” station or do I ride it all the way to this is awesome land.

Standard
Book Trailer, Production

Production: Leather Cover Continued

As you may know (if you read the last post about the leather cover or you are me… which is sort of likely, I do read through these later on sometimes. Hello future Peter) The last leather cover engraving… didn’t go what you would call completely tikatyboo. But I booked in another time on the laser cutter and we were on our way to glory the likes of which had not been seen by mortal men for an age. We arrived feeling the confidence of modest laser users, with one goal and full knowledge of how we would achieve it. I remember thinking “This shouldn’t take too long, just pop the leather in, turn the machine on and sit back and let the magic happen.” Well, as things so often do outside of my mental image of the events, things did not go smooth.

As soon as we entered we where told that the laser cutter was malfunctioning, that the laser was new and out of focus so the engrave setting was being a bit more… cutty than engravey. We were a bit dubious, we thought “Hay, maybe it will work, they haven’t tried engraving leather yet only card so it could be different. But caution did not completely leave us and we decided to do a test version to see if the laser did indeed slice right through our humble leather.

The laser engraved out the outline which seemed all good, unfortunately we wanted it to be A4 but forgot to set it to that so was being cut out on a smaller scale than expected. Which actually meant the test one was a lot quicker, that served our test purposes, allowing us to get the test out of the way quicker. We waited for the laser to engrave in the interior of the first letters to see if it did indeed cut through.

IMG_0508

Voila! no it did not. Perfect, engraved and it looks pretty freeking awesome! With building gusto we moved the bolt of leather so a fresh part of it was targeted by the laser, then reset the engrave layer so it was A4. The laser began its long job, methodically slicing through faux leather with its intense concentrated heat causing the black seem we hoped would make our little bit of fake leather look like a cool old leather bound book. Unfortunately when the fill engraving began We where told we had no time left… which obviously was disappointing.

IMG_0509

But unfortunatly, even if it had kept cutting, I’m not sure if you can see from this picture but…

IMG_0510

Yeah, that whole cutting rather than engraving on the card thing… applied to leather too, probably one of the reasons why the outline looked so much more black and deep than the engraving we did before which looked so faint you could barley see it. So, I have another laser cutter booking next Tuesday, if they have the laser cutter fixed of course, if not it won’t be of much use to us, though i suppose with its deep cut the outline does look rather good.

Standard
Book Trailer, Production

Production: Leather cover engraving

I looked around many an arts supply store searching out my long searched for leather to engrave upon. Searched art side and hobby craft and many others, but all pointed me away saying that i should check a more specialised store or something along those lines.

So I eventually decided some sort of fabric place could get me what i needed, I headed to Dunelm (mainly due to the fact that it was right next to hobby craft so not the most out of the way place) I almost immediately found a good roll of foe-leather which had a mottled black and red hue which i felt worked perfectly.

IMG_0499

As you can see, it fits quite well for an old leather cover and the red i feel give it a bit of a menacing look. We then proceeded to engrave on the leather (well after a rather strange kerfuffle with the online booking system) Then we engraved… unfortunately we could not figure out how to fill the engraving area which was a tad detrimental considering in that earlier picture the engraving is there and is done with only the outline, and as you can see it’s as visible as Micheal Bay’s grasp of coherent narrative.

Other than the whole not being able to see it thing however, it looks quite good. We eventually went to the person in the fablab for help on how to fill in the engraving area. We had tried filling in the vector lines in illustrator and Billy fiddled about with some settingy things in the laser printers menus but to no avail. The woman watching over the fablab then showed us how to fill the area we needed in the laser cutter software in a matter of two seconds she then said something along the lines of “Yeah there you go that’s how you do it. Though it will take a while… and it’s already the end of your allotted time” So we had to bugger off. But we will return, or maybe I will if Billy is busy, I think i can handle the software now, especially with the laser engraving that is less had than lining up all the card cut out stuff we where doing before.

Standard